GUIDE: Making high quality building instructions in BrickLink Studio
By Ties
A few people have asked me for advice when it comes to making building instructions for their MOCs in BrickLink Studio. So in this guide, I wil take you trough all the steps required, like how to set up and prepare your build, how to split you model up into different building steps, and how to make a clear page layout that is easy to read.
I hope that this guide wil help you create great looking and easy to follow building instructions for your own models.
Part 1: Prepare your model
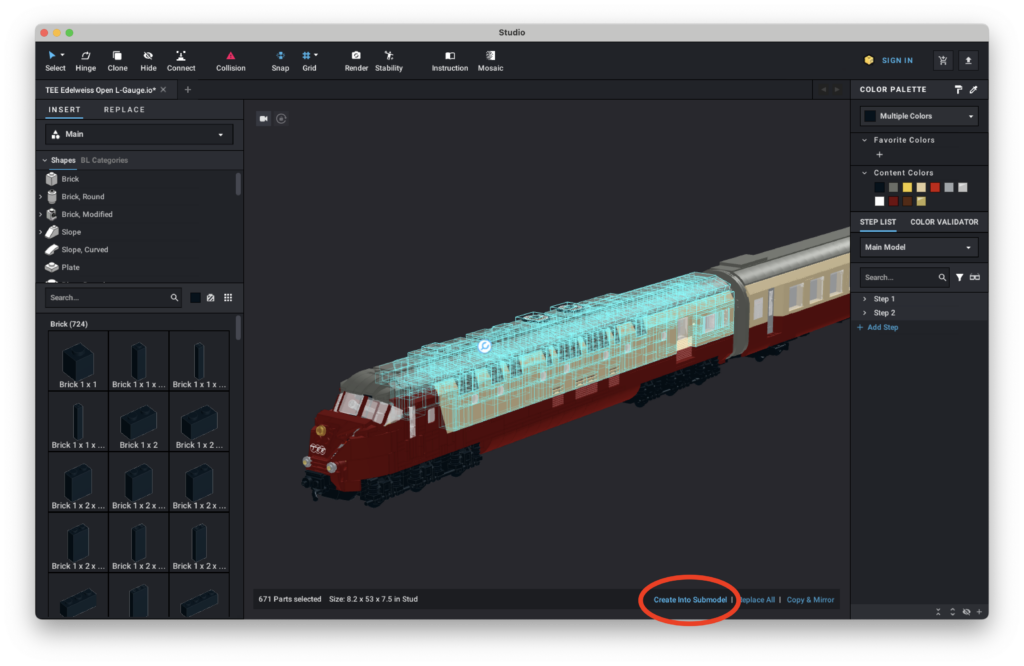
Submodels are a way to group parts together when building in Studio, but they also make life a lot easier when making your building instructions. So before you go into the instruction maker, go over your model, and look for sections of the model that should be built on their own, before being connected to the rest of the model. Think of a removable roof section, the wheel sets of a train, or a window assembly. All of these should be their own submodel.
To create a submodel, select a group of parts, and in the bottom-right corner of the window, click “Create Into Submodel”.
Tip! If you want to use a submodel multiple times (if you want to have 4 of the same chair, for example) only build 1, and turn it into a submodel. Now copy & paste the submodel to create a linked submodel. Linked submodels are automatically grouped together in the building instructions, and any changes you make to on of the submodels wil be applied the other submodels automatically.
Tip! You can create submodels inside other submodels for even more control. When I make my instructions for my own models, I wil often have submodels 3 or 4 layers deep. (“Steam engine” > “Boiler” > “Chimney” for example)
Part 2: Dividing you model into building steps
There are 2 main ways to divide your model into building steps. You can either do it in build mode, or from the instruction maker. Both have their advantages and disadvantages, so play around with both and decide what workflow works best for you. I prefer using the instruction maker, but I wil briefly go over how to move parts to different steps from build mode as well.
build mode
While you are in build mode, you should see a “Step List” section in the side bar on the right, listing all of the elements in the model, and what building step they are in. If you select one or more parts and right-click, an option menu wil appear. From there you can click on “MoveTo” > “New Step” (or select any of the existing seps) to more the selection of elements to a different step of the building instructions. You can also click on the “Add Step” button at the bottom, and drag parts from one step to another.

The advantage of using build mode is that it is easy to move parts around, or make changes to the model while making the building instructions. The downside is that it can be hard to keep an overview of what parts go in what steps. That’s why I prefer using the instruction maken.
Instruction Maker
To enter the Instruction Maker, click on the “Instruction” button in the top of the window. This wil switch to a new layout, optimised for making building instructions.
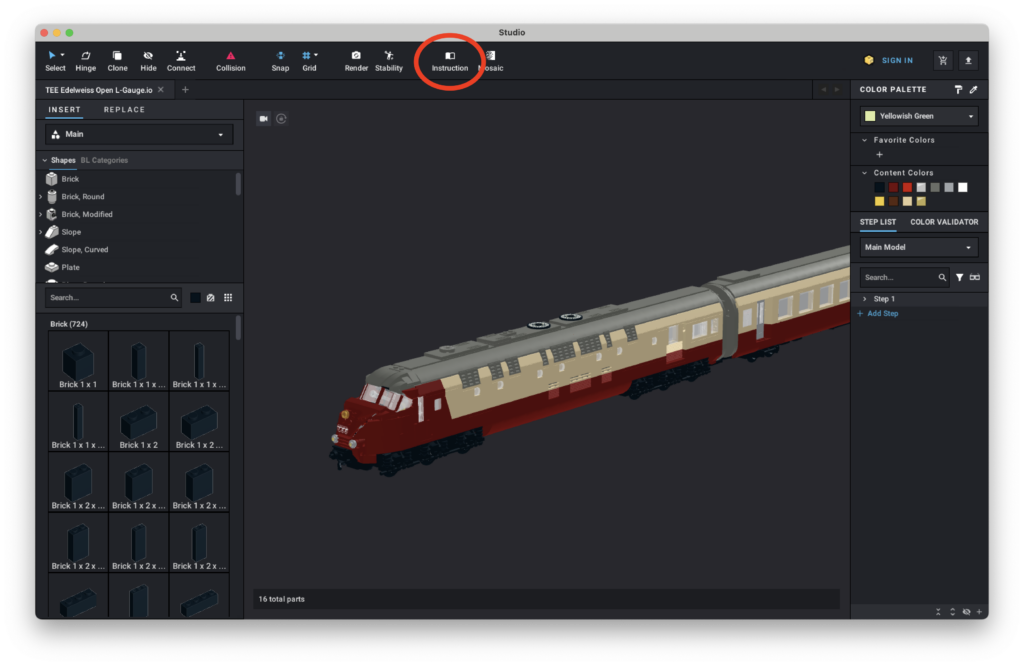
The layout for the instruction maker may take some getting used to, but I find it a lot more useful for making building instructions. All the building steps are shown in the sidebar on the left, with the currently selected step highlighted in a slightly darker color. All the parts in the current step are shown in the drawer at the bottom. The 3D view shows all the parts in the current step, and a transparent wireframe for parts from previous steps. Parts in future steps are hidden.

To get started, find and select the parts you want to use for the first step, (usually part of the frame or another structural base for the model) and click on the “Move to new: Step Before” button. This wil create a new building step with the selected parts, and you should see the parts change from their normal color to a transparent greyish outline in the 3D view. You can select a part either by clicking it in the 3D view, or clicking it in the parts drawer.
Next, select the parts you want to place in step 2, and press the same button again to create another new building step. Repeat this process until all the parts have been assigned to a step.
You can also select parts in the parts drawer, and drag-and-drop them into a specific step in the sidebar if you prefer.

For complex models, it’s sometimes hard to see the parts you want to select next. In this case it can be useful to roughly divide the model into 3 or 4 bigger steps first, before creating the final building steps.
Submodels wil be shown as a single part in the parts drawer, and you can move them into steps like any other part. Just remember to also divide the parts inside the submodel into steps.
To create the building steps for a submodel, select it in the parts drawer, and click on “View Steps”. From here, moving parts into steps is the same as for your main model. To exit the submodel again, click on the “Return to Parent” button in the top-left of the 3D view.

Part 3: Page Layout
Once your model has been divided into steps, we can move over to the “Page Design” section, by clicking the button for it at the top of the window.
Start by setting the size of each page, by clicking on the “Page Setup” button. This wil open a pop-up window where you can select the page size, margins, and color mode. For digital instructions, the default options are fine, but feel free to play around if you like. If you plan on printing your instructions, the options you should use depend on your printer.

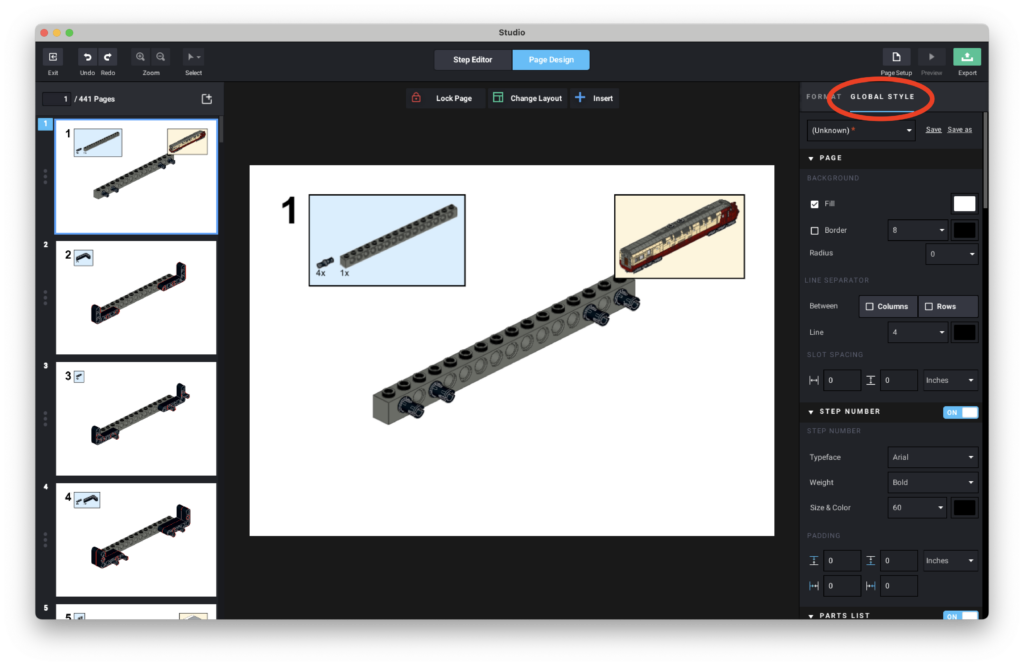
Next, take a look at the “Global Style” options in the sidebar on the right. These options will largely determine the look of your building instructions. Again, the default options are fine to use, but feel free to play around.
Once you are happy with your Global Style settings, we can move on to making sure the scale & view are set correctly for each building step.
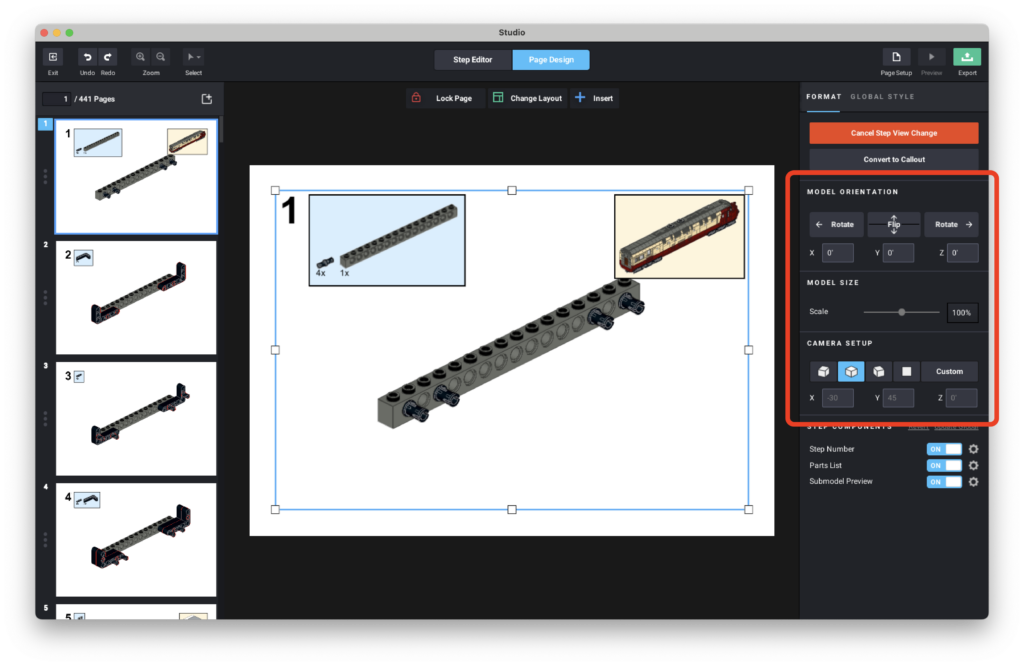
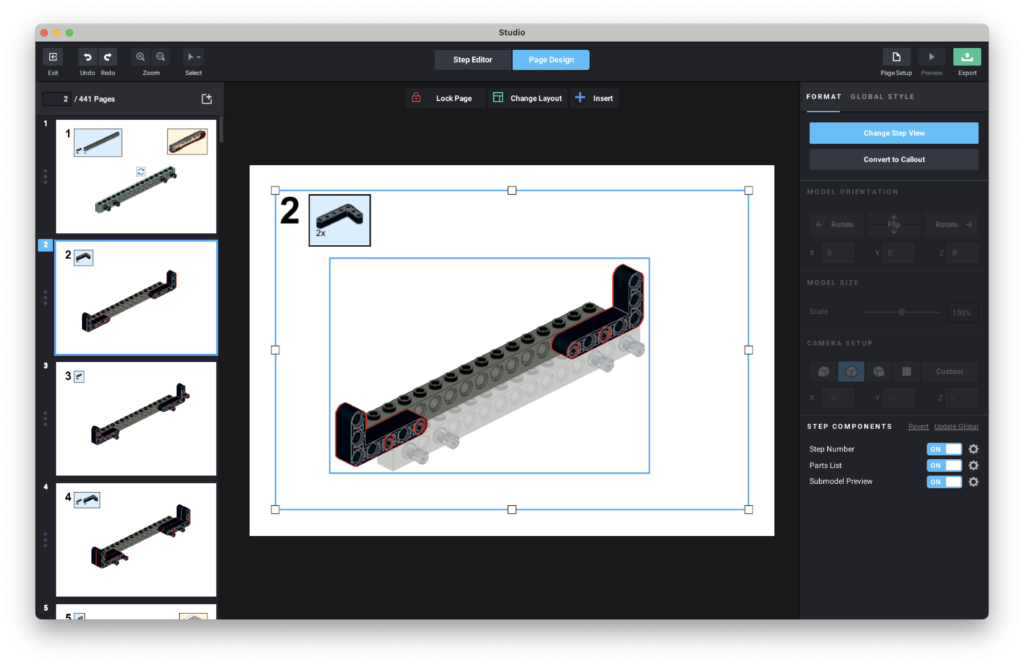
To change the orientation of the model on the page, click on the page, and in the sidebar, click the “Change Step View” button. The grated-our buttons for “Model Orientation”, “Model Scale” & “Camera Setup” should now be active, and you can use them to change how the model is displayed on the page.

When changing the step view part way trough the build, it’s helpful to insert a “Flip” icon and move it to the edge of the page somewhere. This makes the instructions a lot easier to follow for less experienced builders.
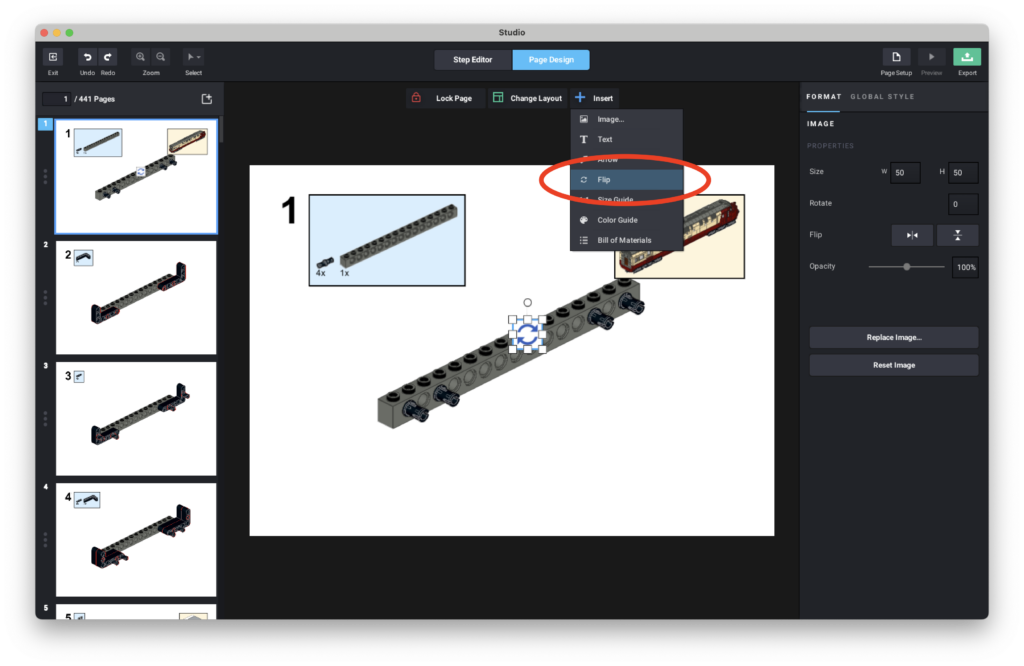
Tip: You can automatically add a flip symbol when changing the orientation of the model, by opening the Studio preferences in the instruction maker, and enabling “Auto flip symbol” under “General”
Studio wil automatically try move the model to an appropriate position, but I usually don’t like where it places the model, so I tend to move the model manually.
To move the model around, move your mouse over the model until you see a blue rectangle appear around the model, and your cursor changes to a 4 way arrow. Now you can click and drag to move the elements around on the page.
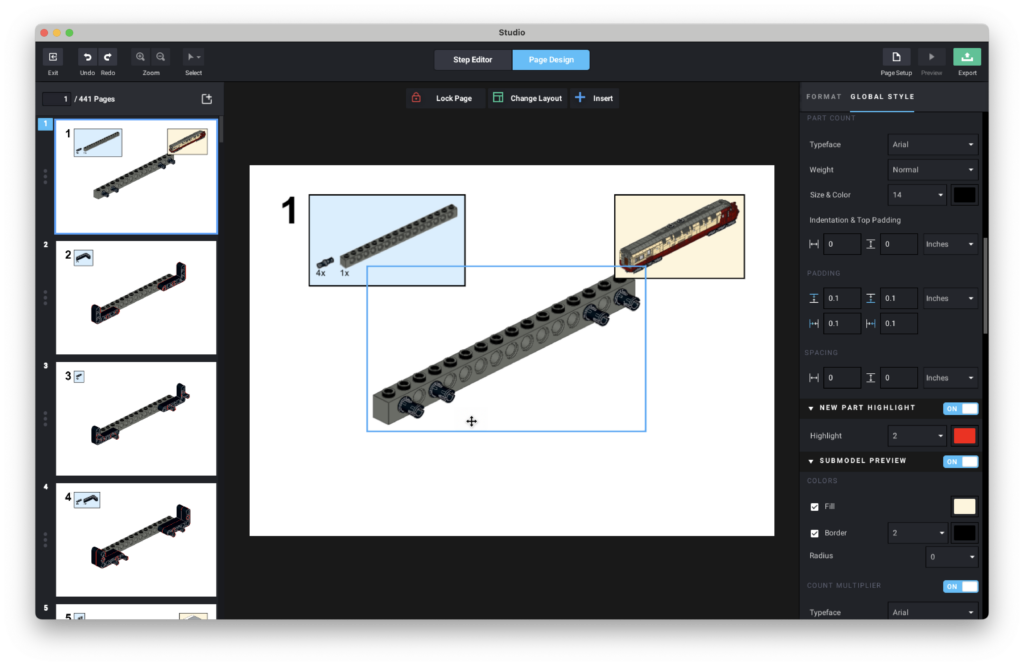
If the step view hasn’t changed since the previous step, you will see a slightly transparent version of the previous step appear while you are dragging the model, to help you line it up with the position it was in in the previous step. The model wil also snap to the previous position, as wel as the page center.
Page Layout
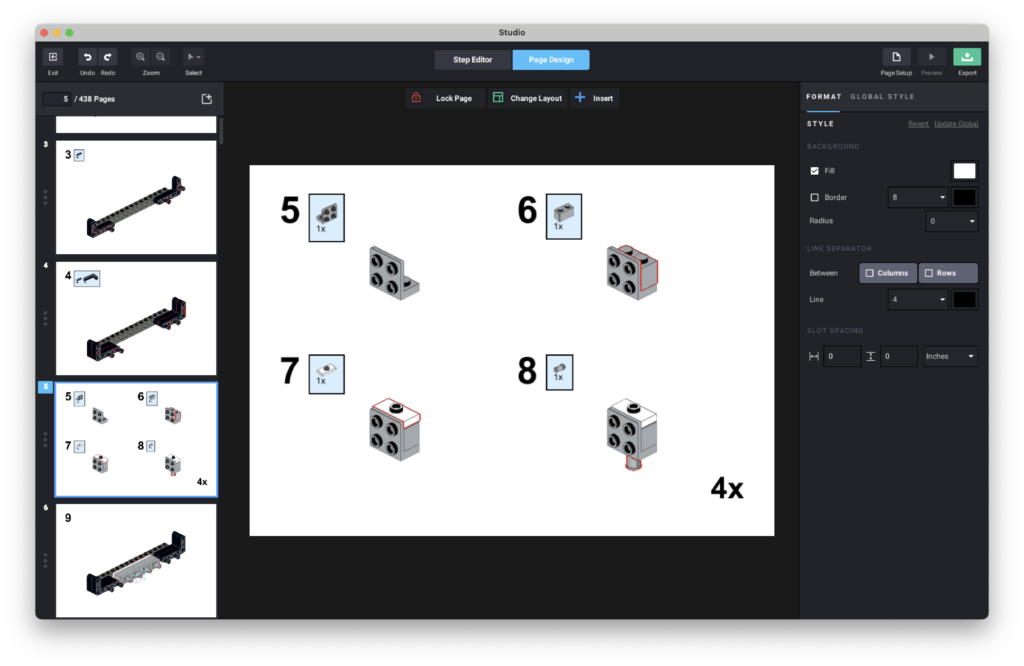
If you are building a smaller submodel, it sometimes makes sense to change the page layout to show multiple steps on the same page. You can do this by clicking on the “Change Layout” button at the top of the screen, and selecting an appropriate layout to use. Clicking on “Apply” wil only effect the current page, “Apply to followings” wil update the layout for the current page and any page after it. (or until the next layout change).

Callouts
The default behaviour for submodels is to show the building steps for the submodel in the same way as the rest of the model. Usually this is what I prefer, but for smaller submodels you sometimes just want to see all steps on one page, along with where the submodel is placed on the model. To do this, select any of the pages showing the submodel, and click on the “Convert to Callout” button. This wil move all of the steps for that submodel into a callout box, that you can place anywhere on the page.


Buffer Exchange
It is possible to move a part in the instruction maker, this can be useful to show how to place a particular part. You can only move parts in the step that they are placed.
To move a part, move your mouse over the part until a turquoise box appears, now click on the part. In the sidebar, there should now be a button to “Activate Buffer Exchange”.

Once you click the button, some arrows wil appear next to the part, and the greyed-out “Offset” and “Arrow” options wil become active. You should be able to move the part by dragging on the arrows, but (in my version of Studio at least) this is not working, so I just enter a number into the X, Y, or Z offset fields.

Once you have moved the part to a new position, an arrow wil appear pointing to where the part should be placed. If this arrow is not quite correct, you can click on it and move it to a better position.
Part List & Cover Image
As a final touch, I like to add a parts list and a cover image to my instructions.
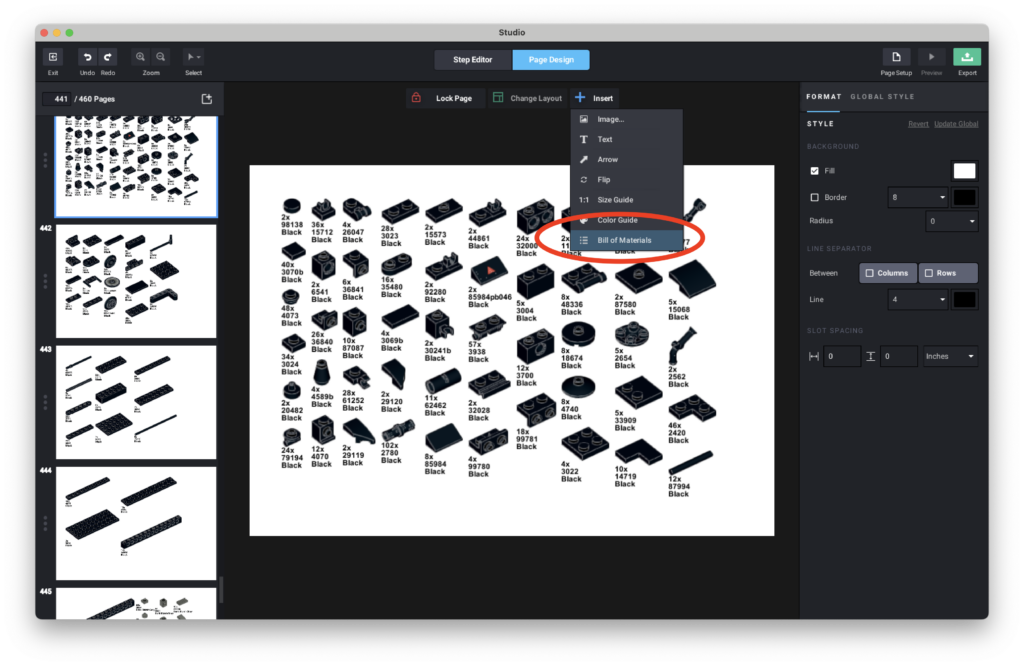
To add a parts list, first create a new empty page at the end of your instructions. Then, click on “Insert” > “Bill of Materials”. This wil automatically generate a list of all the parts used in the model, and place it on the empty page. (and create a few extra pages after it, if all the parts don’t fit on a single page)
To add a cover image, add a new empty page to the start of your instructions, and click “Insert” > “Image…”. If you are making instructions for Open L-Gauge, you can generate a cover image by uploading an image of your model here. The page wil automatically add your name, Icons & a link for the CC licence, and the Open L-Gauge logo to the image you uploaded.

And now your instructions are done! To export the instructions, click on the green “Export” button in the top-right, select what pages you want to export (All or a range), the format (PDF or PNG image sequence), and the image quality (1x, 2x, 4x).
I hope this guide has been helpful. If you have questions, feel free to contact me at ties@open-l-gauge.eu.